Here you will learn how to prepare the surface and then paint it successfully
coverage:
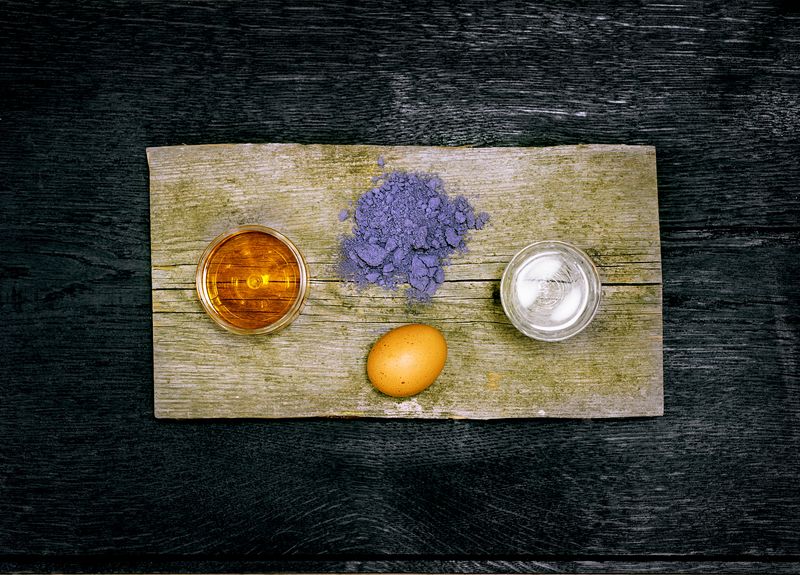
1 bag of färg i påse in your desired color
500 ml of water
raw, cold-pressed linseed oil (see information on the color mixture)
organic eggs (see information on the color mix)
primer
You can use the ready-mixed primer paint to paint on any surface, such as wood, cardboard, wallpaper, fabric, clay plaster, concrete, etc. If the surface is very dirty, wash it beforehand (for example with a soap solution). After cleaning with soapy water, please wipe the surface with clean water.
If possible, avoid fillers, glues, shellacs or other chemical products. These will delay or, in the worst case, prevent the oxidation (drying) of the egg tempera. If the surface is very uneven, you can mix about 200 g of silica into the primer to even out the unevenness. Sand the surface carefully when the primer has hardened.
Freshly painted acrylic/emulsion or latex paint (so-called water-based paints) in the same room can have a negative effect on the oxidation of the egg tempera. Please wait at least 4 weeks after new coats of acrylic/emulsion and latex paints or varnishes before painting with the egg tempera paint. Conversely, you should also wait at least one week after a coat of egg tempera before painting with the so-called water-based paints in the same room.
wood
If you want to paint new wood, you should first wipe the surface with a damp cloth and then paint directly onto the damp wood after about 5-10 minutes. The damp wood absorbs the paint better. If the wood already has an old coat of paint, remove all loose paint residue and ensure that the surface is stable and clean. Protect your eyes and respiratory tract if necessary, as no one knows what dangerous substances or heavy metals are present in an old coat of paint.
Allow the primer coat to dry for a few days with good air circulation and plenty of daylight. Any rough spots can be carefully sanded with fine sandpaper.
Other surfaces
fabric: Spray the fabric with water and wait about 5-10 minutes before painting.
plaster: Before painting cement, lime plaster or concrete, you should wait until they have a pH value of less than 9.
clay plaster: A coat of egg tempera on clay plaster surfaces is best applied a few days after the plastering work, when the plaster is still a little damp.
Painting with egg tempera by Av jord.
Once your primer coat is dry and smudge-proof, you can apply the first coat of paint. Expect to apply 2 coats of paint in the color of your choice (färg i påse). You should always prime unless you want to apply a translucent finish to wood or a wall that has already been painted with Av jord egg tempera.
Paint with a light hand. Apply the paint with a modeler (wide, flat brush) and spread the paint with three or four brush strokes, working your way forward. Don't work with the paint for too long; only paint as long as the paint flows easily from the brush. Only then dip the brush back into the paint. Then brush briefly and lightly over the area you have already painted. This way of working prevents visible transitions. Don't go back to areas you have already painted, either, as these brush strokes would visibly dry out. If you work with the paint for too long, you will destroy the sensitive emulsion and the oil will dissolve from the mixture. You would end up with a very shiny surface.
If the paint does not flow properly when you apply it, you can thin it with water. First try using 100 ml of water (based on one bag of paint mix), then add more sparingly if necessary. If you thin the paint, try to apply the same amount to the entire surface. Otherwise, the different amounts of paint applied could result in shading.
The optimal temperature for painting is between 10-25 °C. At warmer temperatures, the water evaporates more quickly and you should definitely dilute the paint.
If the result seems too busy at first, this will usually correct itself with the next application. If you still want to influence the result, dip the brush you used in a little water and go over the area you have already painted. (At the end of these instructions you will find a video that shows you how to paint again)
drying
The paint hardens through the chemical process of oxidation. This is divided into three phases. The first phase lasts just a few minutes, where the water evaporates. The paint appears a little darker than when applied, "greasy" and is not smudge-proof. After the second phase, the surface no longer stains and the uneven staining becomes less pronounced.
The second phase of oxidation takes 1-6 days under normal conditions. The time depends on the pigment. The third phase of oxidation makes the color stronger and harder and lasts about 1-4 months.
For good and quick drying/curing of the paint, the paint needs a lot of oxygen/good ventilation, the room temperature should be between 15 and 25 °C and the room should be bright and not too humid.
Ensure that the rooms are even better ventilated if the smell of the hardening linseed oil becomes stronger after about 2-3 days and if the paint is still chalky after 3-6 days.
Under very poor drying conditions, the oxidation process interrupts or stops and the paint layer is damaged/destroyed.
Allow the primer to harden for about ½ - 1 day before applying the first coat of paint. This should then harden for 1-4 days before applying the last coat of paint. You can also paint over it after just a few hours. However, the shorter the time between coats of paint, the more painting experience is required and the more paint is used.
polishes for durable surfaces
To obtain a shinier and more durable surface, you can polish the finished oxidized paint surface with a polishing brush.
A vegetable or clothes brush will also do the job.
Clean brushes and tools
The brushes should be cleaned immediately after painting, before the paint dries. Clean the brushes with Marseille soap or another moisturizing soap. The moisturizing effect ensures that the bristles retain their elasticity and do not dry out. The brushes must be soaped really well, otherwise the bristles will harden and stick together and break more easily. All other tools and containers can be cleaned with washing-up liquid.
The painted surface
A correctly painted surface, with primer and the necessary drying times, can last for over a hundred years. Over time, the paint becomes shiny like silk and more transparent. Although the earth pigments protect the binding agent in the paint, it still slowly weathers. After a few years (approx. 5-25 years) the paint layer has become so weak that the surface should be cleaned and a new coat of paint is necessary.
An egg tempera paint made according to the described instructions and with the materials from Av jord will not crack or chip.
If you have any questions, please do not hesitate to contact us.
stains
Stains can also form on an unpolished painted surface. Smaller lines or stains can usually be quickly removed with an eraser or fine sandpaper. If that doesn't help, you may be able to gently dab them away with a damp sponge and washing-up liquid. In doing so, you may end up polishing the surface slightly with the sponge. Then carefully wipe the surface more generously so that the difference in gloss compared to the rest of the surface is not as noticeable. Another tip: a polished egg tempera surface is easier to clean.
Serious damage
It is more difficult to repair damage to a painted surface that was painted many years ago. If you want to touch up your paint after many years, you should buy an extra bag of the paint mix. Then you can be sure that you can touch up your paint faithfully and that there will be no color differences. It is rare to get a pigment from exactly the same place where it was mined years ago. This can cause small differences in the respective shades.
If you want to repair severe damage or scratches on the painted surface, you should sand down these areas until the scratches or indentations have disappeared. Then paint with exactly the same mixture that you originally used. Note that the color naturally changes during the oxidation process. This means that even if the fresh coat looks completely different, it will still take on the right shade after the longer hardening process. You can use a sponge to spread the color along the edges of the original coat to create a smooth transition. If the scratches/damage were so deep that the primer was sanded away, you should prime the area to be repaired first. If the damage is very large, it is advisable to repaint the entire area.